Products
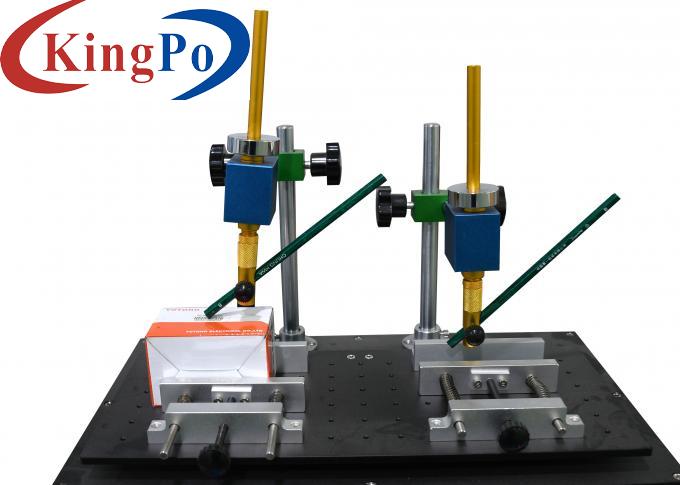
IEC 60669-1 Clause 8.9 Label Marking Abrasion Test Apparatus
Products Description
IEC 60669-1 Clause 8.9 Label Marking Abrasion Test Apparatus
※ A variety of clamping methods and a variety of abrasion methods, which is applicable to different test standards and samples.
1 Equipment Overview
Application: This label marking abrasion test apparatus meets the requirements of IEC 60335-1 clause 7.14, IEC 60065:2014 clause 5.1, IEC 60950:2013 clause 1.7.11, IEC 60669-1 clause 8.9, etc.
It is suitable for all kinds of plastic injection, silk screen surface for abrasion test, such as: computer, mobile phone (PDA), MP3, CD/VCD/DVD, cordless telephone, electronic dictionary and other surface and printing surface.
2 Technical Parameters
Test stations
Two stations
Test stroke
10-60mm, adjustable(Manually adjustable)
Speed
5-60 times /min, adjustable
Counter
0-9999 adjustable
Weight
Two sets of 10g, 20g,50g, 100g, 200g, 500g
Voltage
AC 220V, 50Hz, 5A
Machine size:
510*450*480mm
※ With LED digital display counter, the number of tests can be arbitrarily set, the actual number of tests can be intuitive.
4 Operation Instructions
4.1 Connect to the appropriate power supply AC220/50Hz, rotate the SPEED ADJ. to the lowest level to avoid excessive speed and cause abnormalities in the machine. Then turn on the POWER, press SWITCH run the machine firstly to check whether it runs normally, turn off the POWER if there is any abnormality.
4.2 Choose proper abrasion tools according to different standard requirements, install the corresponding abrasion tools (cotton cloth with petroleum spirit or rubber head or pencil on the fixtures, press SWITCH to let the machine run idling, see if there is any abnormality, confirm that the machine is normal before carrying out the test.
4.3 Fix the sample on the workbench, and keep its friction part vertical and within reasonable range. Coupled with the corresponding test weights to meet the required load requirements for the test.
4.4 According to the requirements of different standards and different products, regulate the SPEED ADJ. to get proper TEST SPEED, then enter the number of test cycles (0-9999) required for friction on the counter, and press the RESET key to reset before setting the value. Note: If the test needs to be timed, such as required to be carried on 15s, operator can adjust the SPEED ADJ. to make the TEST SPEED to be 60, and then set the counter to be 15.
4.5 Press SWITCH to start test.
4.6 During the normal test, if an abnormal situation occurs, operator should press the SWITCH button immediately, and all operations of the machine will stop at this time. When restarting, the counter still records the current number of times, and the test can be continued.
4.7 After the test is completed, the product can be judged according to the result.
5 Maintenance Notes
5.1 The instrument must be placed on a stable surface before use.
5.2 It is not allowed to move the machine during use.
5.3 Select the appropriate power supply voltage, should not be too high, to avoid burning the instrument.
5.4 If the instrument works abnormal, please contact with us for timely processing.
5.5 The instrument must be used in a good ventilation environment.
5.6 Please add lubricating oil to the mechanical transmission part in time due to the large operating load of each component of the button mechanism.
5.7 After each test is completed, operator should clean the machine.
5.8 The control box part must be wiped with a dry cloth.
6 Troubleshooting
6.1 If the POWER is turned on, the instrument is not powered on or the power indicator is not light: if the power indicator is damaged, replace the indicator; if there is no power output at the power output terminal, please check the power cord or power socket-outlet.
6.2 If the power is turned on, the power indicator lights, but the machine does not work when operator presses the SWITCH button. Please check whether there is a disconnection. If there is a disconnection, please connect it in time. If there is no disconnection of the relay, indicating that the counter is damaged, the counter should be replaced in time.
6.3 When the number of times set on the counter is finished, but the motor does not stop working, indicating that the counter is damaged.
6.4 If the power indicator light is on but the counter has no display, it means that the counter is damaged and the counter needs to be replaced.
